What is the Meta Pixel and Why Your Shopify Store Needs It
Shopify Facebook pixel integration is the process of connecting Meta's tracking code to your Shopify store to measure ad performance and customer behavior across Facebook and Instagram. Here's what you need to know:
Quick Setup Steps:
- Create a Meta Pixel - Go to Meta Business Suite > Events Manager
- Install Facebook & Instagram App - Add it from your Shopify admin
- Connect Your Pixel - Link your pixel ID in the app settings
- Choose Data Sharing Level - Select Standard, Improved, or Maximum
- Enable Conversions API - For better tracking accuracy
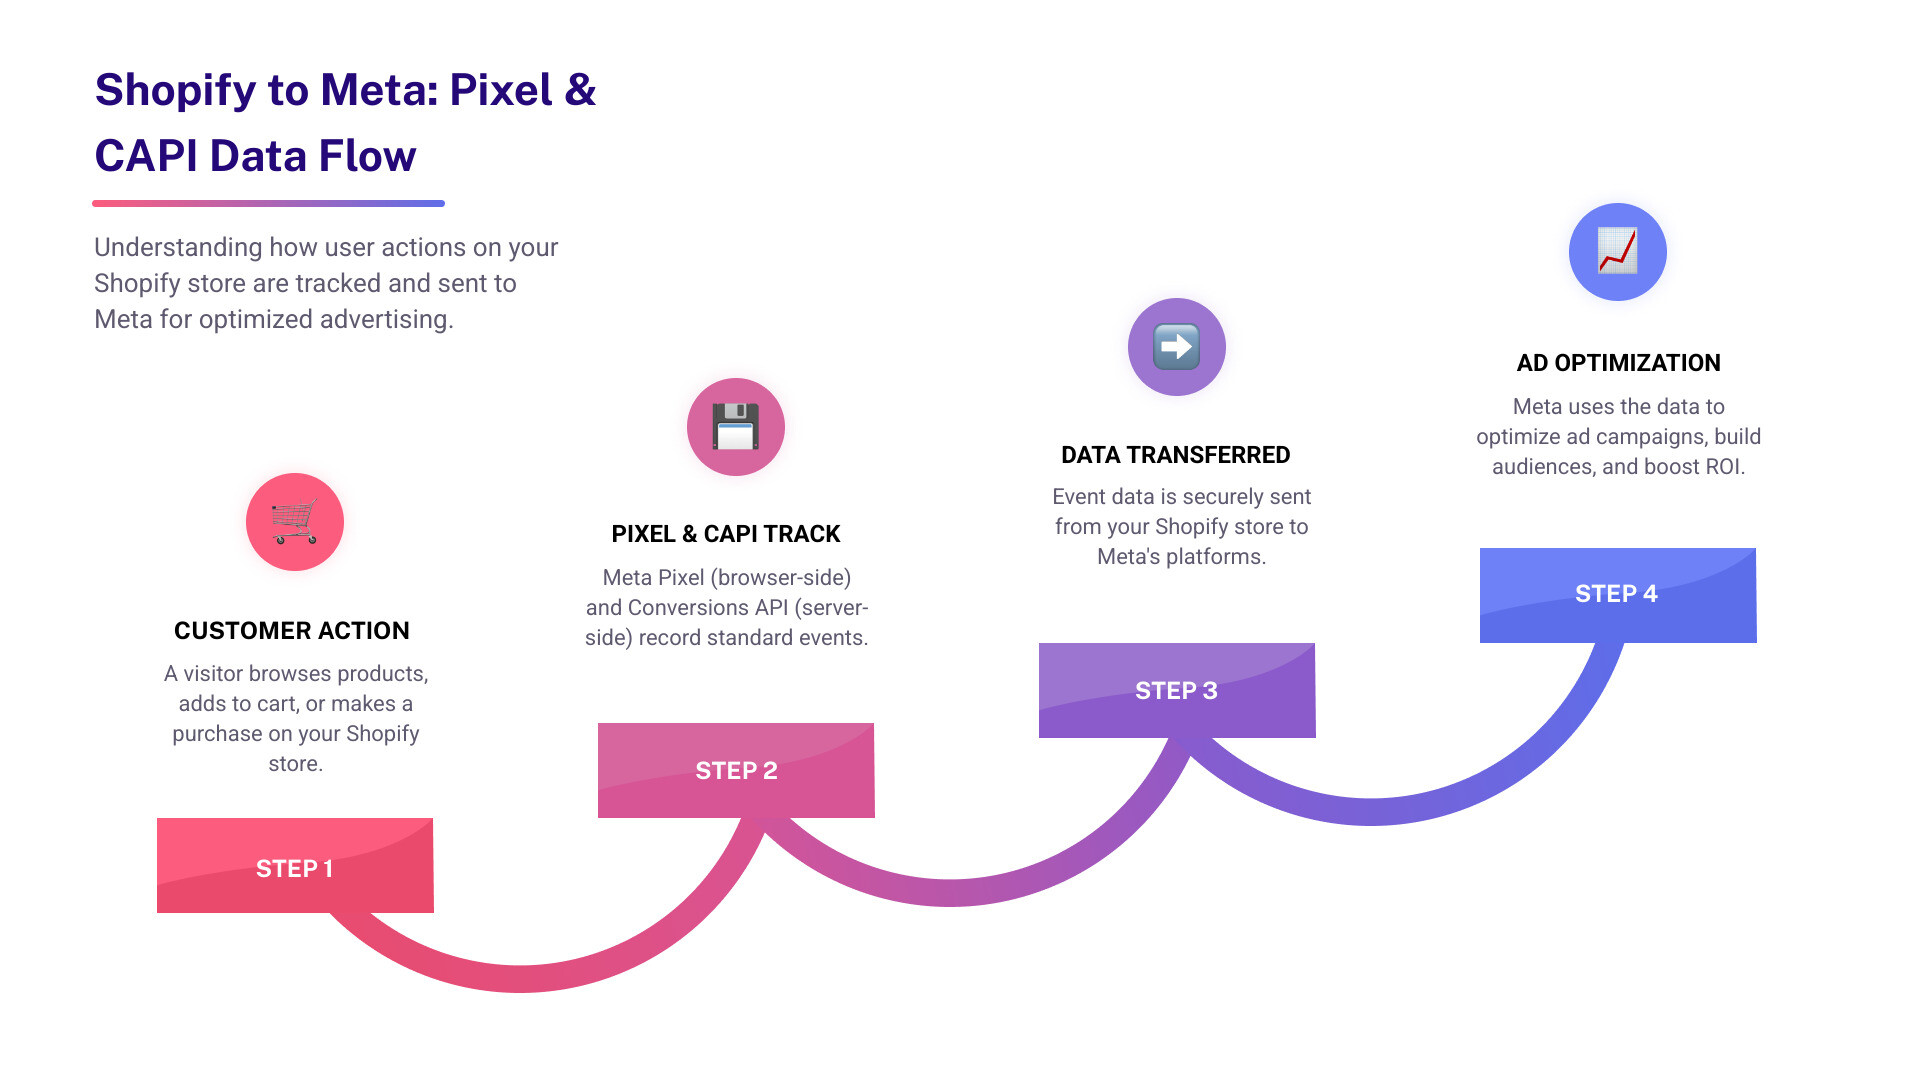
The Meta Pixel is a small piece of code that tracks user actions on your website. When someone clicks your Facebook ad and visits your Shopify store, the pixel records what they do - whether they view products, add items to cart, or make a purchase.
For Shopify store owners, this integration is crucial for three main reasons:
- Measure ad effectiveness - See which Facebook and Instagram ads actually drive sales
- Build retargeting audiences - Show ads to people who visited but didn't buy
- Create lookalike audiences - Find new customers similar to your best buyers
The pixel works by firing events when customers take specific actions. Standard events include ViewContent (when someone views a product), AddToCart, InitiateCheckout, and Purchase. This data flows directly to Facebook, helping their algorithm improve your ads for better results.
Why Native Integration Matters
Shopify's native Facebook integration is the most efficient solution for most merchants. Unlike manual pixel installation, it automatically includes server-side tracking through the Conversions API. This means your tracking works even when customers use ad blockers or iOS privacy settings block traditional tracking methods.
I'm Steve Pogson, founder of First Pier, and I've helped dozens of Shopify brands improve their Shopify Facebook pixel integration to boost ad performance and reduce acquisition costs. Over the past two decades, I've seen how proper pixel setup can transform a store's advertising ROI from break-even to highly profitable.

Shopify Facebook pixel integration vocabulary:
The Complete Shopify Facebook Pixel Integration Guide
Setting up your Shopify Facebook pixel integration might seem overwhelming at first, but I promise it's more straightforward than you think. After helping countless store owners through this process, I've learned that taking it step by step makes all the difference.
The beauty of Shopify's native integration is that it does most of the heavy lifting for you. Unlike the old days when you had to manually add code snippets to your theme, Shopify's built-in Facebook & Instagram app handles everything automatically - including the advanced server-side tracking that many merchants don't even realize they're getting.

How to Create a New Meta Pixel
Before we can connect anything to your Shopify store, you'll need a Meta Pixel. Think of this as creating your tracking ID - it's what tells Facebook which data belongs to your business.
Start by heading to your Meta Business Suite and clicking into Events Manager. If you've never been there before, don't worry - you can access Events Manager directly here. It's Facebook's control center for all your tracking tools.
Once you're in Events Manager, look for the "Connect Data Sources" button. Click it, then select "Web" as your source type. This tells Meta you want to track website activity, not app downloads or other actions.
Next comes the fun part - naming your pixel. I always recommend using something descriptive like "YourStoreName Shopify Pixel" rather than generic names. Trust me, if you ever manage multiple businesses, you'll thank yourself later for clear naming.
Finally, add your Shopify store's URL. This helps Meta understand which website the pixel will track and can sometimes auto-detect existing tracking setups.
Steps for a Smooth Shopify Facebook Pixel Integration
Now that your pixel exists, let's get it talking to your Shopify store. The native integration method I'm about to show you is what I recommend for 95% of merchants because it's reliable, complete, and includes features that manual installations often miss.
Start in your Shopify admin by going to Settings, then clicking on "Apps and sales channels." You can jump straight there using this Apps and sales channels link if you're already logged into your store.
Install the Facebook & Instagram app if you haven't already. This is Meta's official sales channel for Shopify, and it's completely free. Once installed, you'll see it listed in your sales channels section.
Open the sales channel by clicking on "Facebook & Instagram" from your list, then hit "Open sales channel." This takes you into the app's dashboard where all the magic happens.
Here's where things get interesting. Go to the data sharing settings by clicking "Settings" in the app, then "Share data settings." This section controls how much information flows between your store and Meta's advertising platform.
Enable data sharing by toggling the switch to "on." This might seem obvious, but you'd be surprised how many merchants skip this step and wonder why their tracking isn't working.
The final step is connecting your pixel ID. In the "Customer data-sharing" section, you'll see a dropdown menu where you can select your newly created pixel. If you just created it, you might need to refresh the page for it to appear.
Once you've completed these steps, your Shopify Facebook pixel integration is live and collecting data. The system automatically starts tracking standard events like page views, add-to-carts, and purchases without any additional code needed.
What makes this integration particularly powerful is that it includes both browser-side tracking (the traditional pixel) and server-side tracking (the Conversions API) right out of the box. This dual approach means your data collection stays accurate even when customers use ad blockers or have strict privacy settings enabled.
Choosing Your Data-Sharing Level and Adding the Conversions API
With privacy updates like iOS 14.5 and the rise of ad blockers, getting accurate data from your Shopify Facebook pixel integration has become trickier than ever. Think of it like trying to count visitors to your store when some people slip in through the back door - you're missing important information that could help you make better business decisions.
This is where choosing the right data-sharing level becomes key. Shopify offers three options within its native Facebook & Instagram integration, each providing different levels of tracking capability and data accuracy.
| Data-Sharing Level | What You Get | Best For |
|---|---|---|
| Standard | Basic Meta Pixel tracking only. Works through browser-side tracking, but can be blocked by ad blockers and privacy settings. | Stores just starting with Facebook ads or those with privacy-conscious customers |
| Improved | Meta Pixel plus Conversions API. Combines browser and server-side tracking for better data accuracy. Learn more about Conversions API | Most Shopify stores - offers the best balance of privacy and performance |
| Maximum | Full access to Meta's latest advertising technology with detailed customer data sharing | High-volume stores focused on aggressive growth and detailed customer insights |
Standard level relies entirely on browser-side tracking through the Meta Pixel. While this respects customer privacy, it means you'll lose tracking data when customers use ad blockers or have iOS privacy settings enabled. It's like trying to follow customers through your store while wearing a blindfold part of the time.
Improved level is where most successful Shopify stores find their sweet spot. This combines the traditional pixel with the Conversions API, giving you both browser-side and server-side tracking. When the pixel can't fire due to privacy settings, the server-side connection still captures essential purchase and conversion data.
Maximum level shares the most customer data with Meta, enabling access to their newest advertising features and most advanced targeting options. This level provides the richest data set but requires careful consideration of your customers' privacy expectations.
What is the Conversions API (CAPI)?
The Conversions API creates a direct server-to-server connection between your Shopify store and Meta's advertising platform. Instead of relying only on browser-based tracking (which can be blocked), CAPI sends conversion data directly from your server to Facebook.
Think of it as having two ways to communicate with a friend - you can text them (like the pixel), but if their phone is off, you can also call their home phone (like CAPI). This redundancy ensures your important conversion data reaches Meta even when traditional tracking fails.
The beauty of Shopify's native integration is that CAPI setup happens automatically when you choose Improved or Maximum data sharing. You don't need to configure server connections or write custom code - it just works.
For stores serious about paid social advertising, this server-side tracking is extremely useful. More about our paid social advertising services shows how proper tracking setup can dramatically improve campaign performance and reduce customer acquisition costs.
The Conversions API becomes especially important as privacy regulations tighten and browsers become more restrictive. By 2024, relying solely on browser-based tracking will likely leave significant gaps in your data, making it harder to improve campaigns and measure true ROI from your Facebook and Instagram advertising efforts.


